Sunday, 17 February 2013

Putting up Cardboard Weatherboards on my Doll House.

I have been very excited to be able to o some more building on my doll house! I started out by taking some photos of it as it was when I had finished wiping it down inside.


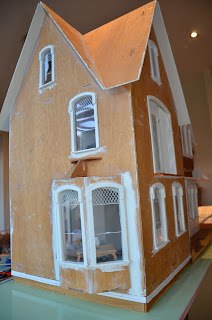
The wall I had partially completed weather boarding.


Here is the whole right hand side of the house.


And the left hand side.


The attics rooms.


The children's room.


And the kitchen.


The master bedroom is on the left and the bathroom on the right.


And here is the lounge on the left and dining room on the right.


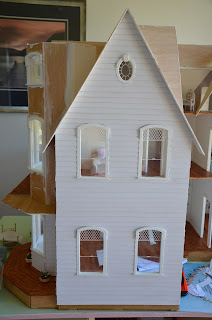
This is the view from the front.


And the back.


I had stored some of my doll house furniture in this box and a few others.


All neatly wrapped in tissue paper.


So I took out all the furniture and set it up as I had had it before we left.

Then I was ready to keep building.

Firstly I finished putting up the weatherboards on the wall that I had partially completed.
I am quite impressed with my own handiwork. :)


Next I decided to do the back wall and the wall between the deck and the back wall.

First I had to pack out the bottom of the wall to make it the right length. I did this to the wall that is on the side of the lounge (the one you can see in the photo above) so that the weatherboards would line up nicely with the level of the deck so I had to do it again here so they would all be even. I used a bit of wood nearly the same thickness as the wall then added a strip of card to make it the same thickness. Next I added a narrow strip to the bottom of that to make the bottom weatherboard stick out on an angle like the rest of them would when overlapped.


I used my story rod to mark where the weatherboards would go. (Which I somehow messed up and then had to do again...)


For those of you who are unsure what I mean by story rod, it is basically a thing that measures the gap between weatherboards. I used a piece of paper with lines drawn across every 14mm. My weatherboards are about 20mm so that means they overlap by about 6mm.

Here is a photo of my story rod.


I draw a line and then I line up the top of each new weatherboard with each line so the bottom of the weatherboard overlaps the one below.


This is where I am up to now with the weatherboards. I decided to catch the back wall up to here before I did the top of this one.


But got up to here and ran out of hot glue!!!


So I changed to a new project; painting my hutch.


I decided to go for a turquoise colour with the inside of the cupboards left bright and the outside distressed with white and then sanded.

Here is the first coat.


And this is with a few coats of the white added. I may add one more coat of white before I sand it but haven't decided yet.


And that's all for now.

xoxo I hope your day is a happy one!

Love Amy.


Saturday, 2 February 2013

A dollhouse in storage, learning to crochet, and making miniature lemons.

I'm back from overseas! We had an amazing adventure and our brains are now stocked full of lovely memories to take out and polish and admire.

It is nice to be home again but I haven't been able to work on my doll house because it is still in storage.


Bethell is living in our old house with Steve's sister Rachael who has been looking after her since we went away. Steve's parents Malcolm and Leanne are kindly letting us stay at their house with them so I have been taking Bethell for lots of walks and hanging out with her. (Our old house is just across the paddock from Steve's parents place.) 

Here is Bethell enjoying one of our walks.


And here she is showing me how cute she is. 


Awwww. 


Although I haven't done any work on the actual house I have made a start on some other mini projects.
I want to make some crocheted mini afghans to go on the beds or maybe hang on the back of the couch (which doesn't exist yet...)
I hadn't done any crocheting before (only knitting of beanies and scarves in life size). I found a video on youtube that was quite good though (you can view it here) and had a try. 

This is my first attempt.


I also decided to get adventurous with my polymer clay and found this excellent tutorial by Stephanie Kilgast on making miniature lemons (diameter about 6mm). They turned out okay for my first try I think but I have some things to perfect as the middle of the lemons are a bit wonky. I must have stretch/rolled the cane out funny. It took me ages to make the cane but I still have lots left so hopefully I have got some of it right. I'm not sure what to do with these now though...
Any suggestions?


Later on today...

Excitingly today Steve (my boyfriend) and Chris (our friend) moved my dollhouse out of storage and up to the little lounge at Malcolm and Leanne's! 

Here they are just squeezing it through the door of the room we had it stored in. It almost didn't fit - the Garfield Dollhouse is quite wide. 


There was a bit of maneuvering to get around the corner...
 I lent a helping hand to keep it balanced.


And then they were away.


It fit nicely in the back of the van.


And Steve slowly and carefully drove it up to the big house. 


Where they safely deposited it. Yay!


I gave it a wipe down inside as it had accumulated a bit of dust even though it had been covered.


Yay! I am SO excited that I can get building again!!!
Thank you boys for lifting it for me. :)

And welcome to all my new followers! And hello again all my old ones!
I hope you all have a very lovely day! 
Love Amy