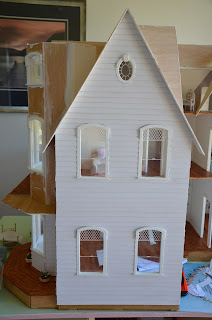
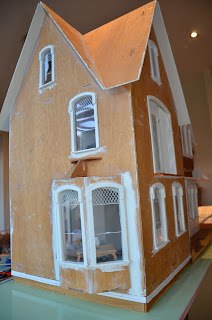
I have been very excited to be able to o some more building on my doll house! I started out by taking some photos of it as it was when I had finished wiping it down inside.
The wall I had partially completed weather boarding.
Here is the whole right hand side of the house.
And the left hand side.
The attics rooms.
The children's room.
And the kitchen.
The master bedroom is on the left and the bathroom on the right.
And here is the lounge on the left and dining room on the right.
This is the view from the front.
And the back.
I had stored some of my doll house furniture in this box and a few others.

All neatly wrapped in tissue paper.
So I took out all the furniture and set it up as I had had it before we left.
Then I was ready to keep building.
Firstly I finished putting up the weatherboards on the wall that I had partially completed.
I am quite impressed with my own handiwork. :)
Next I decided to do the back wall and the wall between the deck and the back wall.
First I had to pack out the bottom of the wall to make it the right length. I did this to the wall that is on the side of the lounge (the one you can see in the photo above) so that the weatherboards would line up nicely with the level of the deck so I had to do it again here so they would all be even. I used a bit of wood nearly the same thickness as the wall then added a strip of card to make it the same thickness. Next I added a narrow strip to the bottom of that to make the bottom weatherboard stick out on an angle like the rest of them would when overlapped.
I used my story rod to mark where the weatherboards would go. (Which I somehow messed up and then had to do again...)
For those of you who are unsure what I mean by story rod, it is basically a thing that measures the gap between weatherboards. I used a piece of paper with lines drawn across every 14mm. My weatherboards are about 20mm so that means they overlap by about 6mm.
Here is a photo of my story rod.

I draw a line and then I line up the top of each new weatherboard with each line so the bottom of the weatherboard overlaps the one below.
This is where I am up to now with the weatherboards. I decided to catch the back wall up to here before I did the top of this one.
But got up to here and ran out of hot glue!!!
So I changed to a new project; painting my hutch.
I decided to go for a turquoise colour with the inside of the cupboards left bright and the outside distressed with white and then sanded.
Here is the first coat.
And this is with a few coats of the white added. I may add one more coat of white before I sand it but haven't decided yet.
And that's all for now.
xoxo I hope your day is a happy one!
Love Amy.


Hallo!
ReplyDeleteI just found your blog :-)
This house is wonderful and I'm sure a lot of work. At the moment I'm builging the Beacon Hill dollhouse!
You are doing a great job! Everything looks so perfect and well fitting!
I'm looking forward to see more pictures of the building progress
Hugs, Lina
Dear Amy,
ReplyDeleteI love to follow your blog. I have the same dollhouse. It's nice to see your progress.
Greetings Dorien
I'm quite impressed with your weatherboard handiwork as well and other creations too.
ReplyDeleteI have just found your blog :) Your house is very big and beautiful. I am looking forward to seeing your progress. The hutch is wonderful.
ReplyDeleteHugs Maria
Thanks everyone! I really appreciate your kind comments! :)
ReplyDeleteAmy
You are coming along nicely. It is fun to follow your progress.
ReplyDeleteAt the moment I am building the halfscale Fairfield (SnippetsOfMyHalfscaleFairfieldJourney.blogspot.com.au) so I know the amount of work that goes into these houses. Your work is paying off - this house is looking wonderful. I really like the floors, must go back some posts and catch up. The weatherboarding is going well too.
ReplyDeleteThanks Sandra! I really appreciate your comments. :)
ReplyDeleteLove the weather boards. You have inspired me to have a go on my house which is to be an old west saloon.
ReplyDeleteLove the weather boards. You have inspired me to have a go on my house which is to be an old west saloon.
ReplyDeleteSounds wonderful! I'd love to see photos!
DeleteI know it's been a long time since you posted this, but would love to see the finished product and also know what glue you used?
ReplyDelete