Steve and I went back home to New Zealand for a lovely long holiday over Christmas and New Year and had a fantastic time. We spent time at home over Christmas, but also drove right up north to Rarawa Beach to camp over New Years with some lovely friends, and later we drove down to Taranaki which is very beautiful. The picture below is of Steve admiring the view there.
Since I've been back in Fiji, I've been working hard on doing the edits on my novel. I made some changes to character motivation, which in turn meant there was quite a bit of re-writing to do. But it is all part of the process.
Don't worry, I have also been working on my mini cottage. I managed to get the photos off the memory stick in the end, and I've also done tonnes more.
When I was part way through my construction, Caroline, the lovely blogger from Cinderella Moments did a series of posts about making your own custom dollhouse. The posts are wonderful reading (and so is her whole blog—I LOVE it!). If you are making your own dollhouse and you get stuck on how to do something, her fantastic tutorial might give you some great ideas. I got the idea for using concrete on the outside of my house from her. Her work always inspires me and her blog is outstanding (and so are her minis!) so click
here to head over and check out Cinderella Moments.
On to the update on cottage progress. I'll apologise in advance for the less-than-outstanding photos. It's pure laziness really! But hopefully they will give you an idea of how I did things.
I think this about what the cottage looked like last time you saw it...
So once I had the walls and door in place I started work on the bay window. I decided the size and shape I wanted, then made a top and bottom shape and glued them to the window hole.
Then I glued down the floorboards on the bottom floor. (There was no reason to do this next—I just wanted to!)
Following that, I cut out the shapes for the front of the bay window. I wanted to make the tops of each window curved so I made a template, then traced the shape, then cut the holes.
It looks so cute from the inside!
I used dressmakers pins again to add extra strength, but it is also glued together with white glue.
Next I painted the bay window and added the first floor. I cut out a hole where the stairs will go. Originally I'd planned for the stairs to be at the other end of the room, but I changed my mind, so I just flipped the cardboard over.
Here you can see what the hole looks like. And you can see the pins sticking up from the floor. I pushed some through from the bottom before I glued down the cardboard. The pins are for poking into the upstairs walls. When Steve first saw it sitting on the table before I attached it to the cottage, he thought I'd created some sort of torture card to skewer his hand on, haha.
Next the walls were added. I had to add on extra height to the foam core board that I used for the side walls, because the bits I had weren't quite big enough. That worked out fine though. You can't even see the seam now.
This is what the front wall is like. Later it will look better I promise!
And then I painted it all inside and out. This is just the first coat, but I did a few over time.
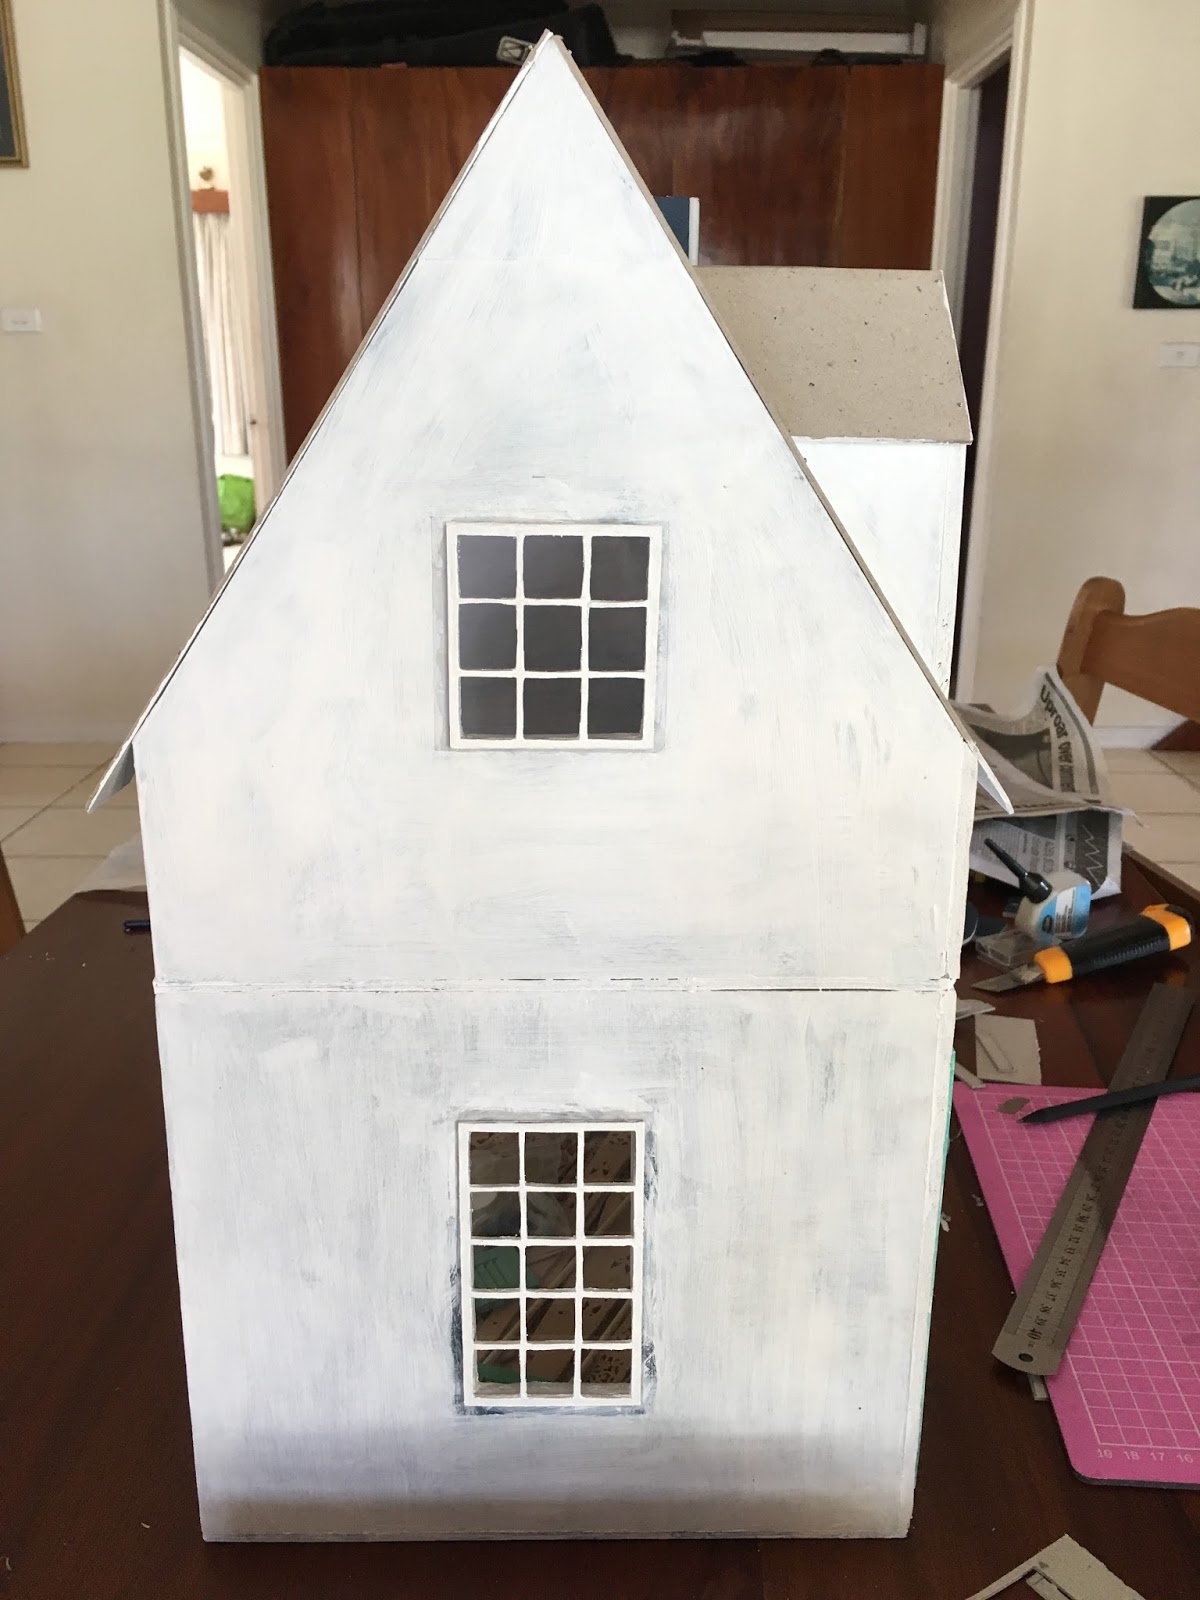
Next the roof went on the front. I wanted to make dormer windows. They were extremely tricky to work out. The the measuring took me ages!
Here you can see a close up of part way through the process.
I made sure that all the lower parts of the windows were right and matching up with the holes in the roof before I cut out the shapes where the dormer window roofs would meet the main roof.
I had to make a few adjustments as I worked. I used a piece of folded paper to help get the angle right. My Dad explained that there is a perfectly easy way to work it out with equations...but I decided to stick with the practical approach.
When I was confident with the shapes, I cut the extra triangle shaped holes in the roof.
Then I added the dormer roofs. Here's what it looks like from the inside.
And here is what it looks like from the outside.
Our neighbour's ginger kitten came to try out the cottage and thought it was pretty nice.
That was where I got up to before Christmas.
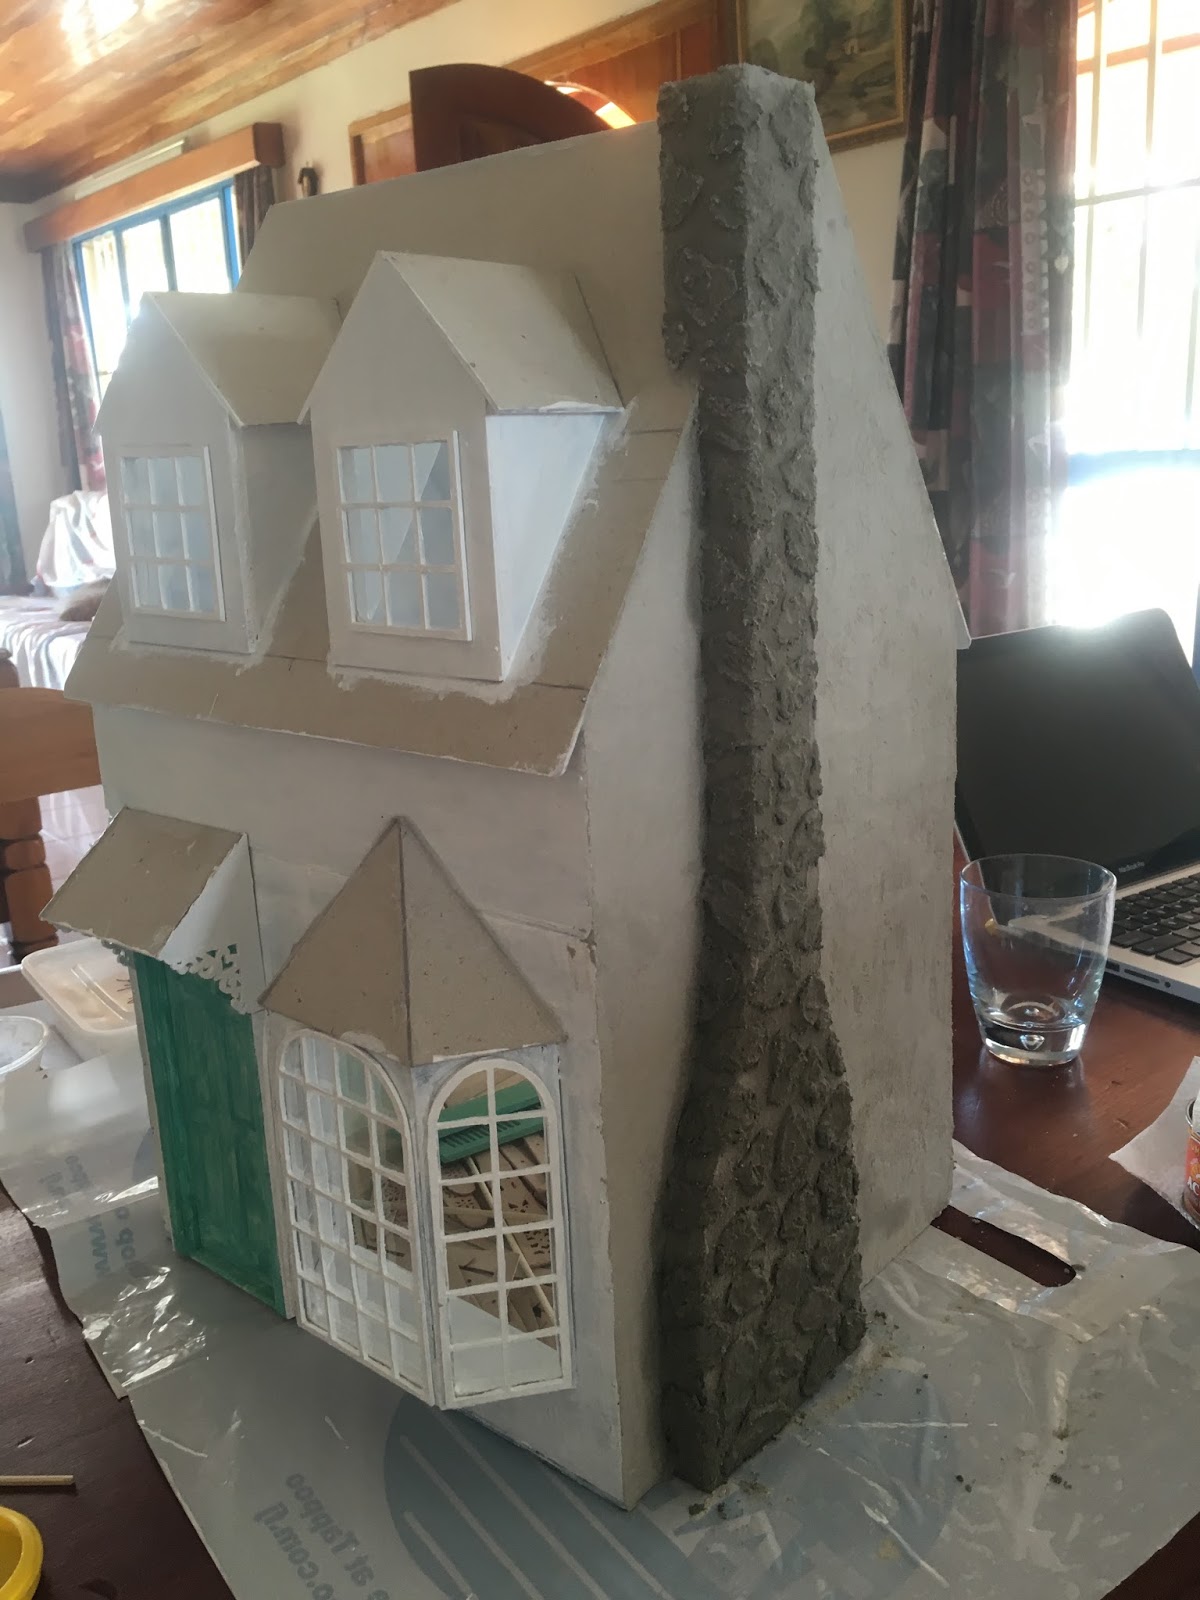
When we got back, I set to work on adding a chimney.
I wanted a wonkyish old-school looking one, so I made it a bit uneven.
Then I cut the shapes from foam core board.
And glued it all together.
I had got some plaster and some concrete from a friend up in Fiji, so I made a bit of both up and tested it on an off-cut of the foam core board to check that it didn't have a reaction with either.
Both were fine.
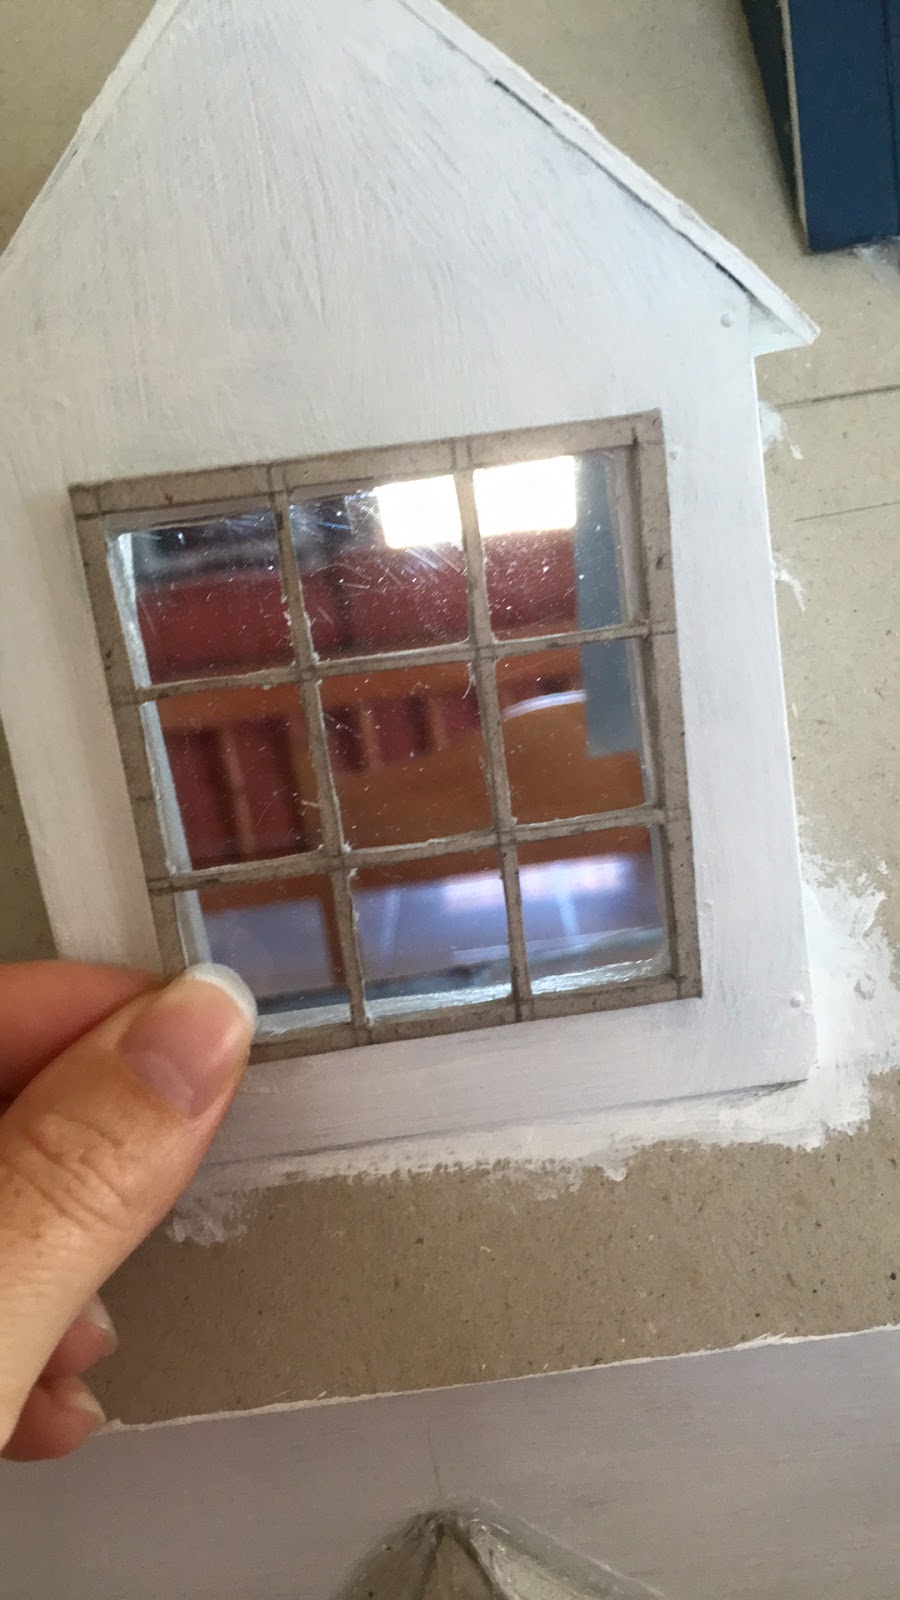
Before I did anything else though, I needed to make the windows and window frames.
The 'glass' I made from some clear plastic that I think normally goes on the front of bound documents. There were some scrappy bits at a local stationary shop so I bought a few of them and cut out the best (least scratched) bits for the windows.
I made the window frames out of cardboard and carefully cut out all the holes with a craft knife. It took a very long time but I think it was worth it. They look so cute!
I love little details like that on a dollhouse.
Then I painted them all white on both sides. When I'm painting double-sided things I normally do it on a cut open plastic bag so that the bits don't get stuck to the surface I'm painting on.
Once they had all dried, I glued them on. I used Testors clear parts and window maker glue. I wanted to make sure that any glue that squeezed out onto the 'glass' didn't make it go all icky.
Don't they look adorable?
I decided I wanted a little roof over the front door so the dolls don't get wet when their keys have disappeared to the bottom of their bags and it's raining.
I made a flat bit with a little angled roof and taped them in place to see how they looked.
Not bad.
But I wanted something a little fancy. I drew a pattern for some lovely fretwork to add to the side. Then very carefully cut it out with a craft knife. (Luckily I had a good audio book to listen to while doing that otherwise I might have lost patience.)
I taped it together to see how it looked.
Then drew and cut out the other side.
I added side bits for the door.
Later I think I'll add another thin layer that covers just the triangle at the top and the long pole part so that the fretwork is slightly recessed.
I took it all off again and glued it together.
Then painted it and stuck it on the cottage.
Doesn't it look nice!
Then I took a few photos of what the whole cottage looked like at that stage.
Finally it was time to do the concrete. I was really looking forward to that bit. I didn't have any proper tools though, so I used a popsicle stick to put the concrete on the house, then smoothed it out with a thin bit of plastic that I cut from an old packet. I also didn't have any of the type of concrete that Caroline suggested, so I used regular builders concrete. I just mixed a bit of the concrete powder with a bit of water until the consistency seemed right.
To make the stones on the chimney I followed the advice of
Caroline and put on bits of concrete over the top of the base coat I did for the chimney. Thanks Caroline for the great tip! I used the end of a wooden skewer to define the edges.
I LOVE the way it turned out!
The next day I put the concrete on the other two walls.
The sides of the dormer windows and around the bay windows were the trickiest bits. (Luckily I had my audio book on hand.)
Once it was all dry on the following day, I painted it all white. I had originally intended to leave it white, but now I've decided to paint it a different colour instead, because the windows don't stand out enough. I'm not sure what colour to paint it though. What do you think? My first thought was a light peachy coral colour, because it would make a nice contrast with the door. Steve thinks a bluey grey colour would look nicer. I think both would look nice in their different ways. I don't know if I'd add grey to the blue though. Do any of you have any suggestions?
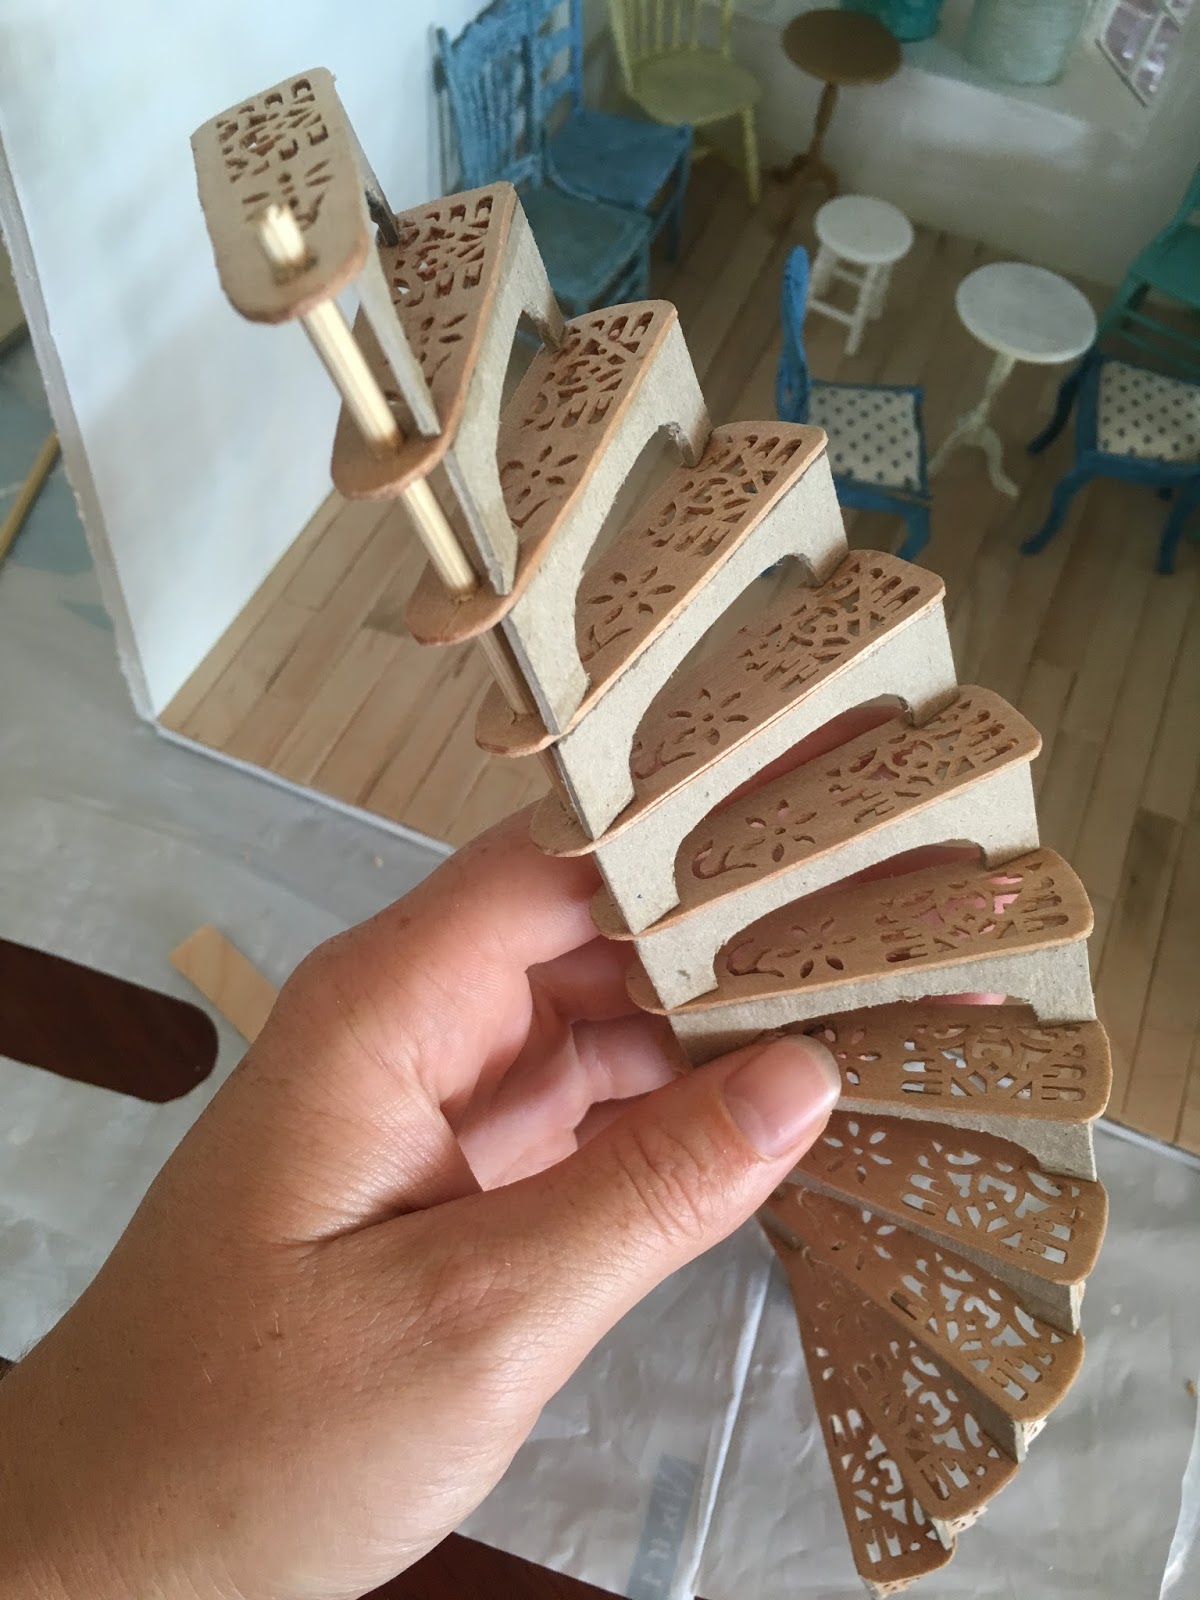
This is where I'm up to on the inside. I've done a few more layers of paint. I need to make the staircase and fireplace next. And when the staircase is done, then I can do the floor upstairs.
I hope you enjoyed the update!
Love Amy.