This post has been a long time coming. I have been so busy working on my dollhouse that I never quite get around to blogging...
I've been adding some details to my dollhouse which has been fun!
I also painted this painting to be the logo for my business of selling art and now dollhouse miniatures. I just love making them so much!
I've been adding some details to my dollhouse which has been fun!
I also painted this painting to be the logo for my business of selling art and now dollhouse miniatures. I just love making them so much!
Other progress includes putting the corner boxes over the weatherboards.
Gluing on more weatherboards.
This is how I get the right angles in tight spaces. I just use a piece of paper and fold it in the correct shape for the angle.
I then use the paper as a template to cut the cardboard. (I normally cut it slightly longer than needed incase minor adjustments need to be made.)
Then I check it fits perfectly before I apply the glue. If I've botched it up I save that piece for the next weatherboard up.
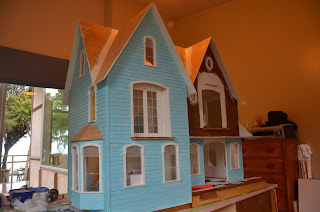
I'm super happy with the way the weatherboards are turning out. The Garfield Dollhouse is really huge and It has taken a lot of card to cover it (and a lot of time to cut and glue the card), but it has been so worth the effort!
When I had completed all the weatherboards except those that are above the porch roof I painted them with the blue paint.
Isn't it cute!
Bethell was being helpful as usual...
The next big job was sanding and painting all the porch railing pieces.
Before I could do that though I had to go and buy some more of the white paint (called old whiskers) but unfortunately my local Mitre 10 does not sell it anymore because it is a British Paint colour which is now exclusive to Bunnings rather than Mitre 10! Grrr. To cut a long story short, after several weekends wait and several unsuccessful driving missions I was finally able to acquire some.
I took a photo of the label just in case.
In between waiting for paint to dry I installed the kitchen door (a fiddly ordeal with a charming finish).
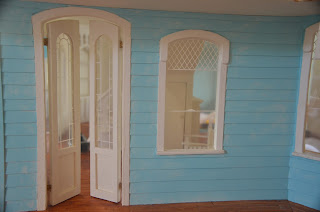
And then the front doors.
Which was tricky.
Especially because I had to line up the two doors.
Yay! It looks cool though!
Then it was time to paint the backs of all the railings...
I like to paint things like that (fiddly things) on old shopping bags cut open.
A good tip is when one side of the railing is finished and dry, peel it off, sand the blotches of paint off the back and flip the bag over (this prevents any paint on the bag getting stuck to your nice paint job).
I began gluing on the trim.
In between coats of paint...
Bethell enjoys sitting on the instructions when I am trying to read them.
And finally it was time to put the railings on!
This part was so fun because you can really see the progress happening.
Next step was putting on the porch roof.
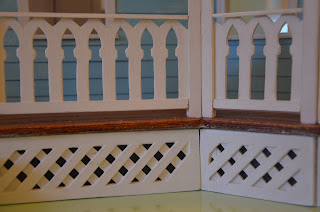
Then laminating the trellis together with some tacky glue.
I use these paper clamps to hold the bits together while the glue is drying.
Then... MORE painting!
I painted the base of the house a dark charcoal colour so that when the trellis goes on top it looks as if it is the dark underneath of the house.
I glued the roof to the removable bay window.
Then attached the trellis. Cute!
Finally it was time to put on the rest of the weatherboards.
There were a few tricky shapes to fit around.
But I really love the way it has turned out! Can't wait to paint it!
You can see here the difference that the corner boxes make.
This is what the house currently looks like.
I ran out of cardboard when I only had about 4 or 5 rows to go! Grrr!
Look! Just the top of the tower to go! Boo hoo!
So I decided to make my first miniature artwork.
I prepared these frames.
And painted my first mini watercolour. I love the result. I hope other people will too so I put this one for sale in my etsy shop. My first mini for sale. Exciting!

In the mean time my kitchen table is enjoying the view!
Thanks for stopping by! I hope you didn't fall asleep after that super long post!!!
xoxox Amy


